How to Set Up uTorrent with a SOCKS5 Proxy:
Anonymous Torrenting Step-by-Step
Without a proxy, every peer in the swarm, your ISP, and copyright monitoring agencies can see your real IP address. Setting up a SOCKS5 proxy in uTorrent routes your torrent traffic through a trusted server — the swarm sees the proxy IP, not yours. This guide walks through the full setup with real screenshots and shows you how to verify it works.

- ✓ uTorrent installed (3.x or later — this guide uses 3.6)
- ✓ A SOCKS5 proxy with username/password auth — this guide uses TorSentinel Armor
- ✓ About 5 minutes
? Why SOCKS5 and not a VPN for torrenting?
A VPN tunnels all your device traffic, which adds overhead and often reduces speeds. SOCKS5 works at the application level — only uTorrent's traffic goes through the proxy while your browser and other apps are completely unaffected. For torrenting specifically, SOCKS5 delivers faster speeds with the same IP protection. The key requirement is that your torrent client supports SOCKS5 with authentication, which uTorrent does natively under Preferences → Connection.
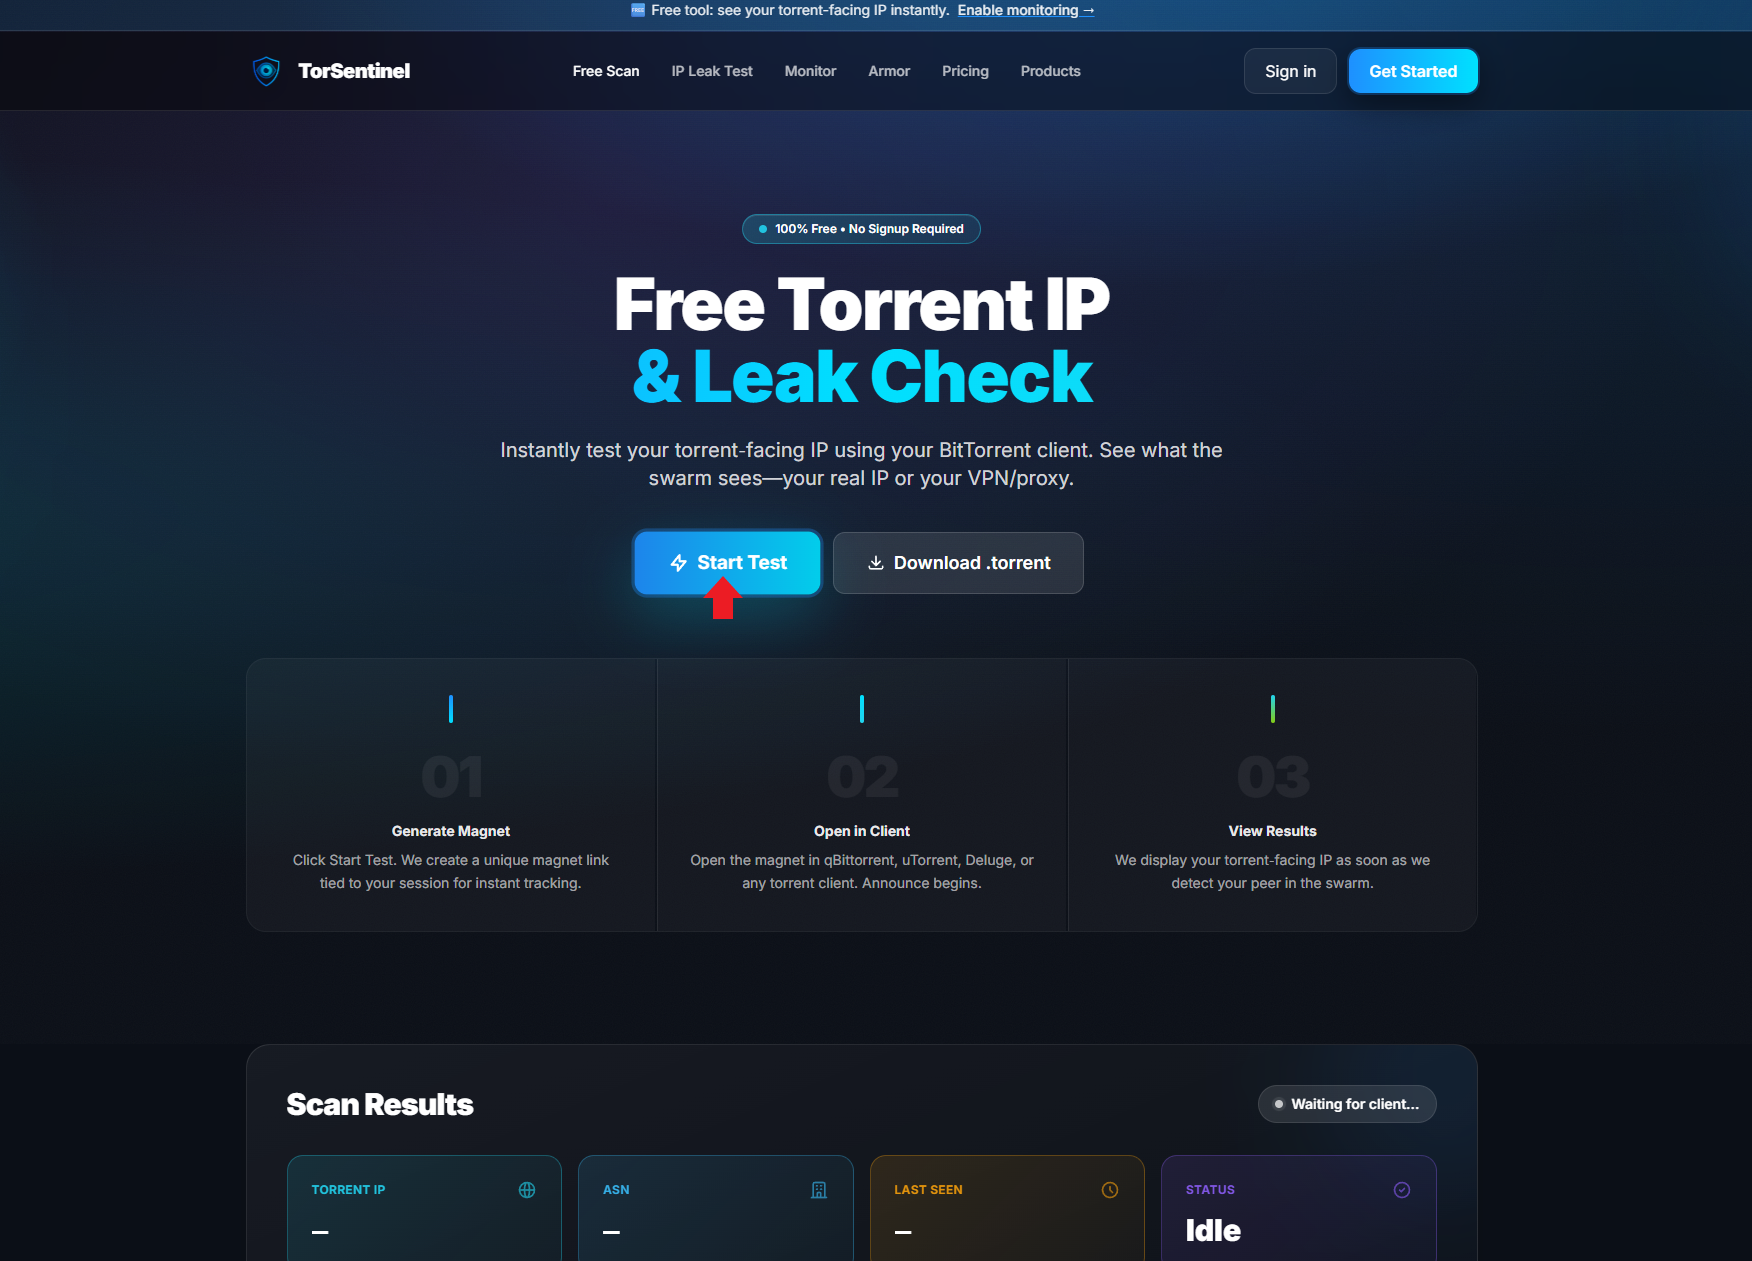
Go to TorSentinel and click Start Test
Before configuring anything, run a baseline check so you can see the difference. Visit torsentinel.com/torrent-ip-check and click Start Test. This generates a unique magnet link tied to your session.
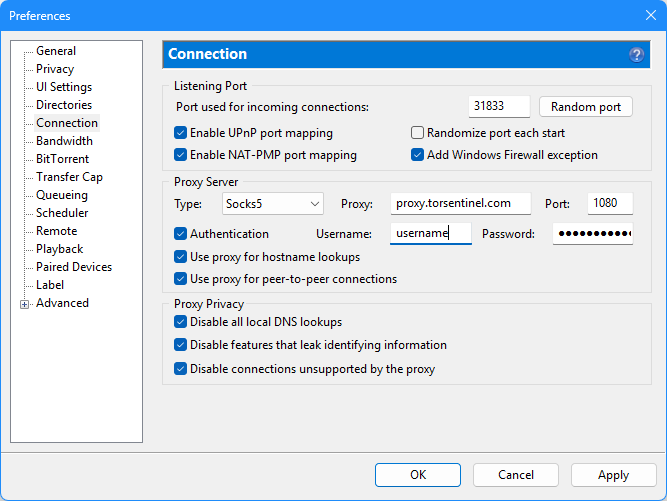
Open uTorrent Connection settings
In uTorrent go to Options → Preferences → Connection. By default, the Proxy Server section shows Type: (none) with all proxy fields greyed out. This is the unprotected state — your real IP is fully exposed.

Enter your SOCKS5 proxy details
Change the Type dropdown to Socks5. All proxy fields will activate. Fill them in exactly as shown below using your TorSentinel Armor credentials.
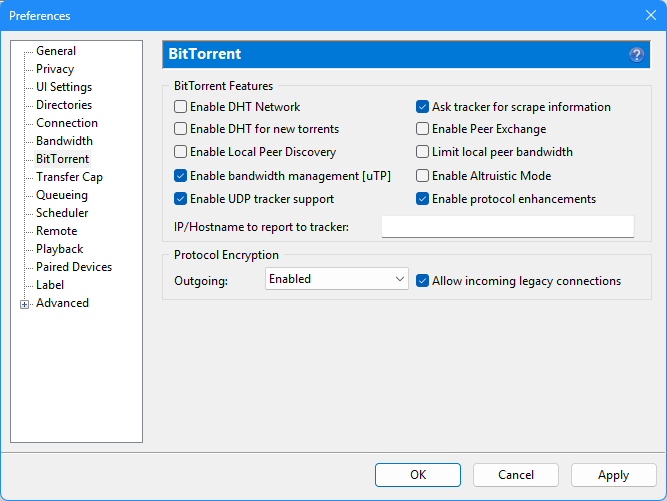
Disable DHT, PEX, and Local Peer Discovery
Go to Preferences → BitTorrent. These three discovery features bypass the proxy and will expose your real IP in the swarm. Uncheck all of them.
Verify your setup with TorSentinel
Click OK to save all settings. Now verify the proxy is actually working — not just configured. Follow these steps:
Go back to TorSentinel and click Open Client
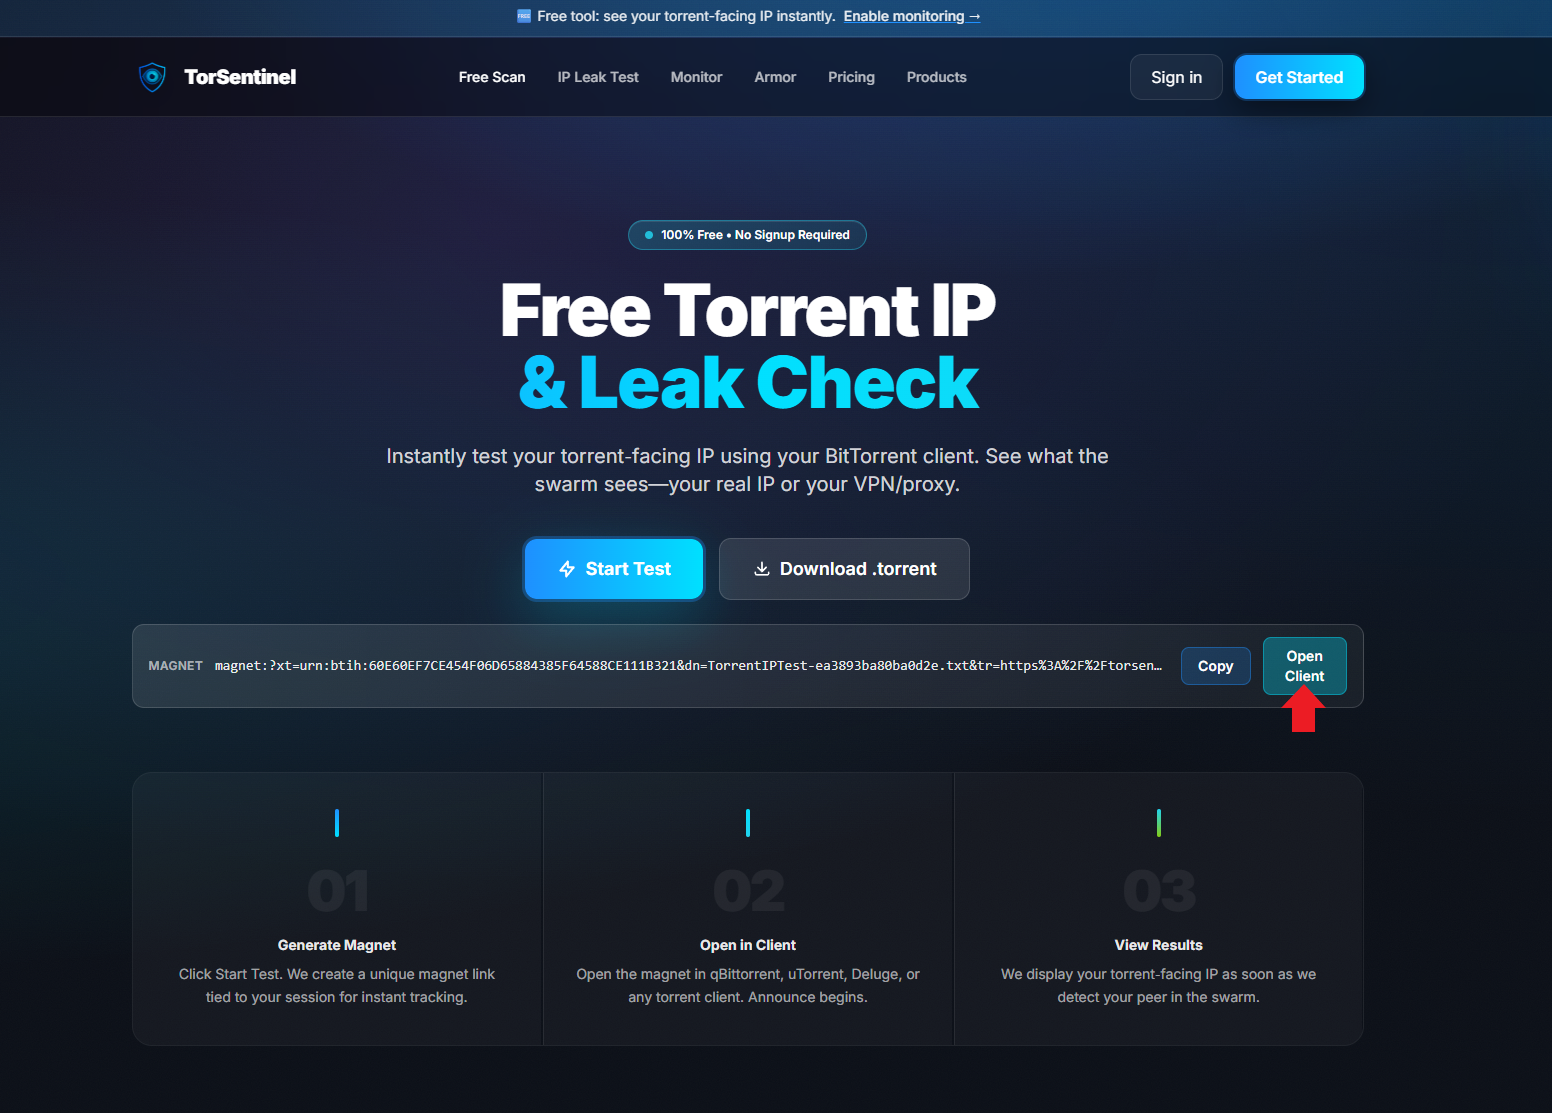
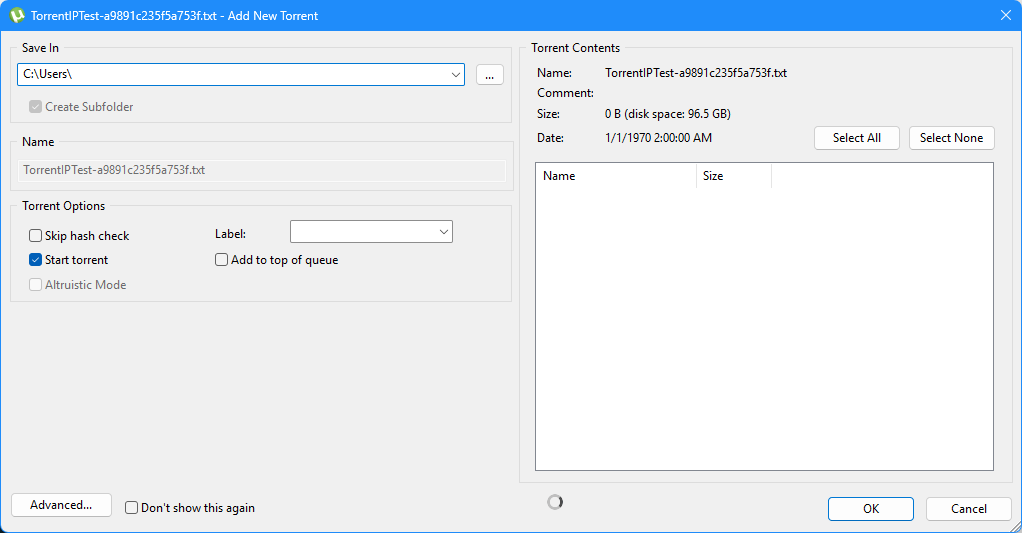
uTorrent opens the Add New Torrent dialog — click OK
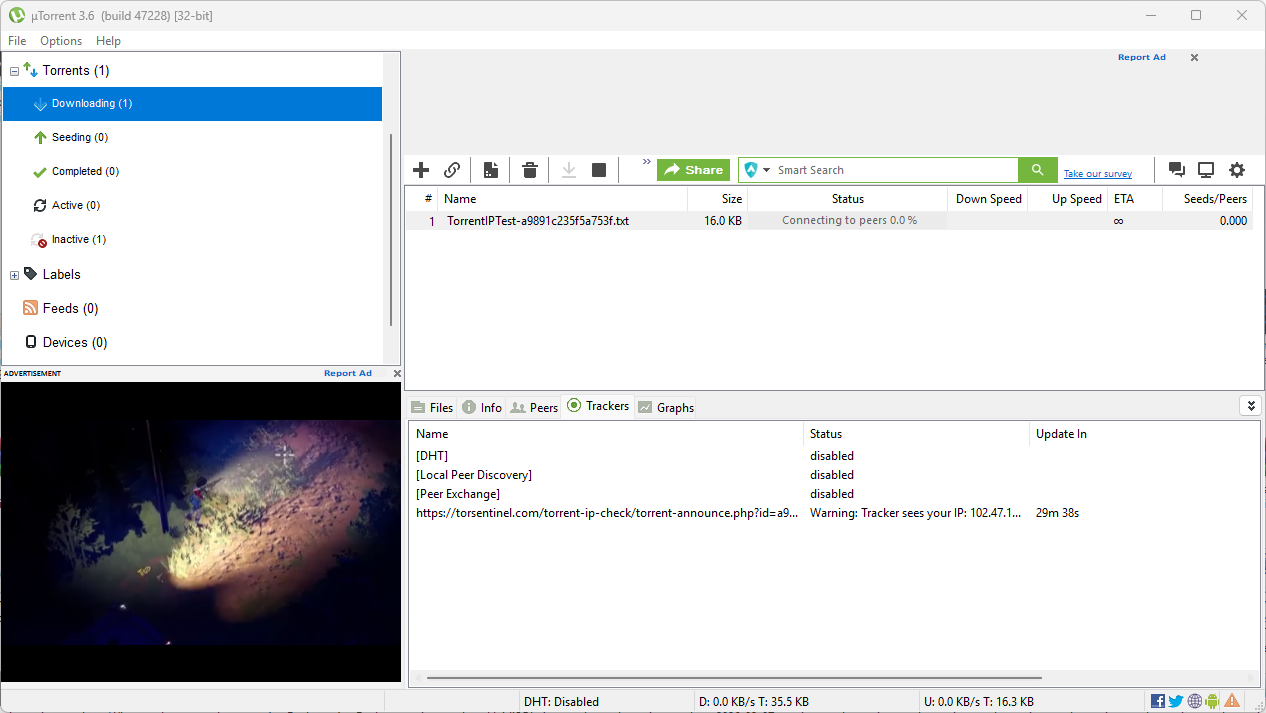
Watch the Trackers tab — uTorrent connects to the TorSentinel announce URL
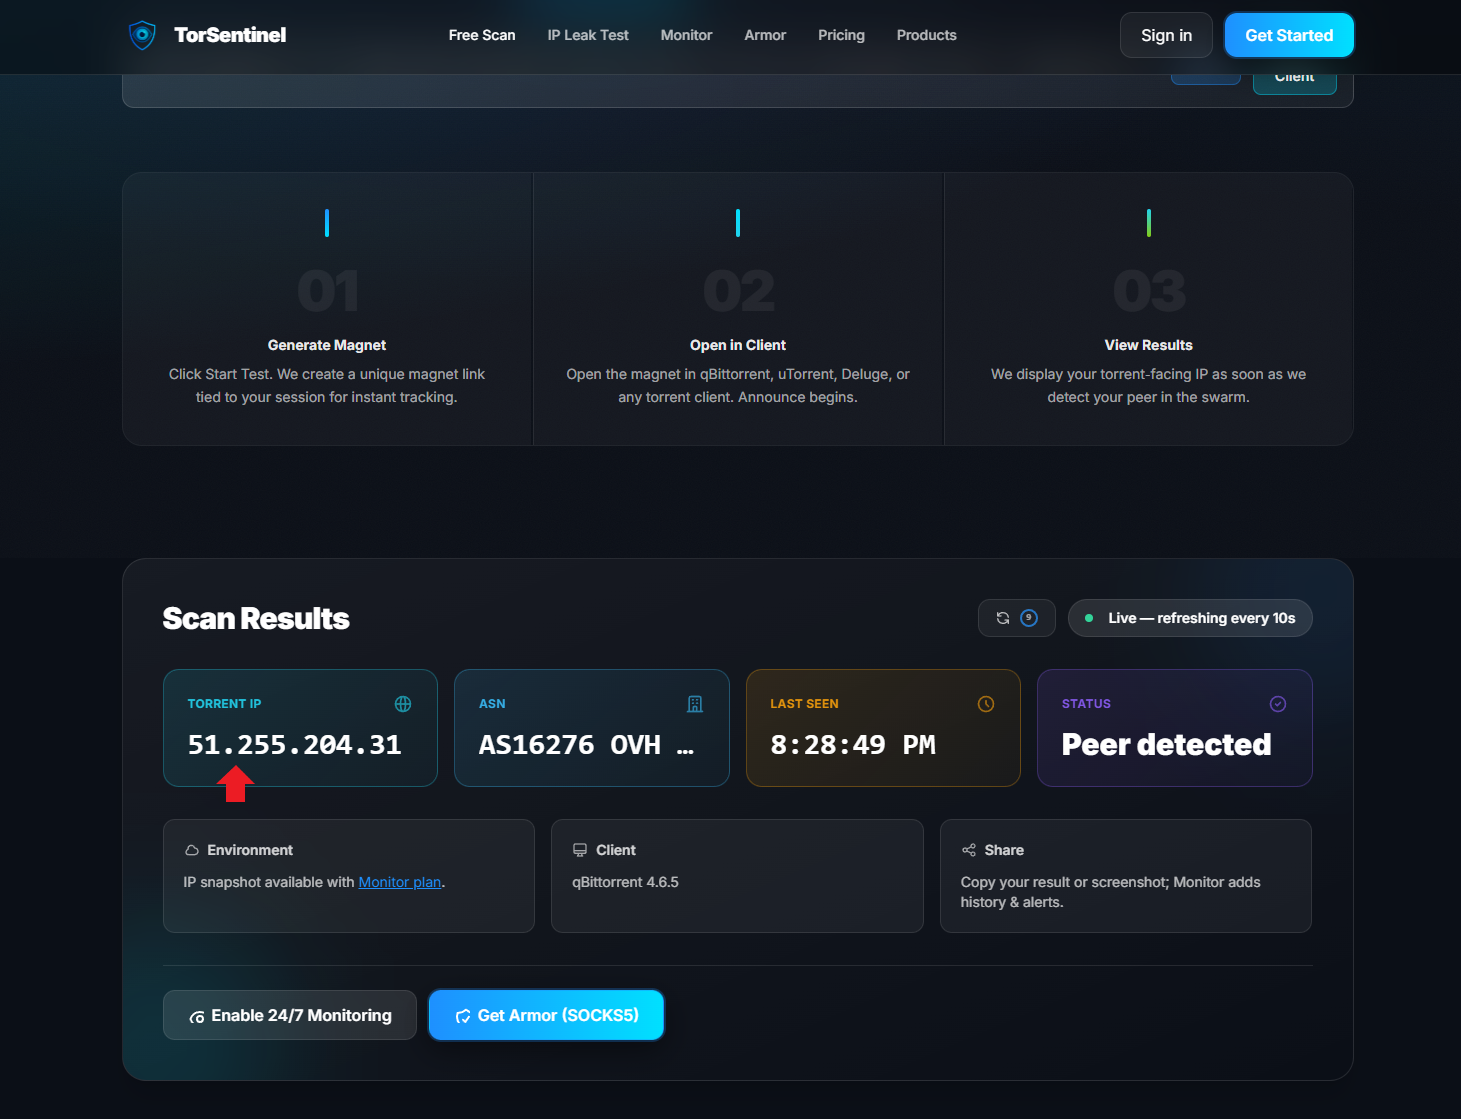
Switch back to TorSentinel — the Scan Results panel updates live
✓ What good results look like
💡 uTorrent-specific notes
FAQ Troubleshooting
TorSentinel shows my real IP, not the proxy IP
Tracker status shows "Could not connect to tracker"
Download speeds are slower than usual
Scan Results shows "Idle" and never updates
torsentinel.com/torrent-ip-check/torrent-announce URL and confirm its status. If it says "Connection refused", the proxy isn't passing tracker traffic — recheck the Connection settings.
Get TorSentinel Armor + Monitor
Armor provides the SOCKS5 proxy. Monitor watches your torrent-facing IP around the clock and alerts you the moment something changes — so you know before anyone else.